
SSH On Raspberry Pi: A Comprehensive Guide & Troubleshooting!
Can you unlock the full potential of your Raspberry Pi from anywhere in the world? Enabling Secure Shell (SSH) is the key to remote access, but its more than just a technical step; its about expanding your control and flexibility over your projects.
Over the next few sections, we will delve into the various methods available for enabling the SSH protocol on your Raspberry Pi. Each of these approaches is designed to be relatively straightforward, allowing you to select the option that best aligns with your specific requirements and technical comfort level. This guide aims to empower you with the knowledge to securely connect to and manage your Raspberry Pi, enhancing its utility and your overall experience.
Understanding SSH and Its Importance
SSH, or Secure Shell, is a cryptographic network protocol that allows you to establish a secure connection to a remote computer or device. In the context of a Raspberry Pi, this means you can access and control your miniature computer from another device, such as a laptop, desktop, or even a smartphone, regardless of your physical location (assuming you have an internet connection).
- Secrets Revealed Alice Rosenblum Leaks More
- Alice Rosenblum Tiktok Leaks Onlyfans What You Need To Know
The primary benefits of using SSH with your Raspberry Pi include:
- Remote Access: Manage your Pi without needing a physical keyboard, mouse, or monitor connected to it.
- Secure Communication: All data transmitted through SSH is encrypted, protecting your information from eavesdropping.
- Command-Line Control: Execute commands and manage your Pi's operating system remotely.
- File Transfer: Easily transfer files between your Pi and other devices.
Given these advantages, enabling SSH is often the first step for users looking to maximize the versatility of their Raspberry Pi. However, its essential to approach this with an understanding of the security implications, which we will also explore.
Methods to Enable SSH
There are several ways to enable SSH on your Raspberry Pi. The method you choose will depend on your current setup and preferences. Here are some of the most common approaches:
- Alice Rosenblum Exclusive Insights Latest Updates Discover Now
- Unveiling Alice Rosenblum Leaks Updates You Need To Know
1. Enabling SSH from the Raspberry Pi OS Desktop
If you have a monitor, keyboard, and mouse connected to your Raspberry Pi, this is perhaps the easiest method. Heres how you can enable SSH directly from the Raspberry Pi OS desktop environment:
- Open Raspberry Pi Configuration: Click on the Raspberry Pi icon in the top-left corner of the screen, then select "Preferences" and then "Raspberry Pi Configuration."
- Navigate to the Interfaces Tab: In the Raspberry Pi Configuration window, click on the "Interfaces" tab.
- Enable SSH: Locate the "SSH" option and click the "Enable" radio button.
- Click OK: Click the "OK" button to save the changes.
Once SSH is enabled, you can connect to your Raspberry Pi from another device on your network.
2. Enabling SSH During Operating System Installation (Headless Setup)
For a "headless" setup (i.e., without a monitor, keyboard, or mouse), you can enable SSH during the initial operating system setup. This is particularly useful if you don't plan to connect a display to your Pi.
- Prepare the SD Card: Flash the Raspberry Pi OS image onto your SD card using an image writing tool like Raspberry Pi Imager.
- Enable SSH via the Boot Partition: After the image is flashed, insert the SD card into your computer. You should see a partition named "boot."
- Create an "ssh" file: In the "boot" partition, create a new empty file named "ssh" (without any file extension). This file acts as a flag to enable SSH upon the first boot.
- Configure Wi-Fi (Optional): If you want your Pi to connect to a Wi-Fi network automatically, you can create a file named "wpa_supplicant.conf" in the "boot" partition. This file should contain your Wi-Fi network's SSID and password. Heres an example:
country=US ctrl_interface=DIR=/var/run/wpa_supplicant GROUP=netdev update_config=1 network={ ssid="Your_Wi-Fi_SSID" psk="Your_Wi-Fi_Password" key_mgmt=WPA-PSK } - Insert SD Card and Boot: Safely eject the SD card from your computer and insert it into your Raspberry Pi. Power on the Pi.
After the Pi boots, SSH will be enabled.
3. Enabling SSH via Command Line
If you have already set up your Raspberry Pi and have command-line access (perhaps via a console cable or a temporary connection), you can use the command line to enable SSH.
- Open a Terminal: Open a terminal or SSH session to your Raspberry Pi.
- Run raspi-config: Type the command `sudo raspi-config` and press Enter.
- Select Interface Options: Use the arrow keys to navigate to "Interface Options" and press Enter.
- Select SSH: Select "SSH" and press Enter.
- Enable SSH: Choose "Yes" to enable the SSH server and press Enter.
- Finish and Reboot (If Necessary): Follow the prompts to exit raspi-config. If prompted, reboot your Pi.
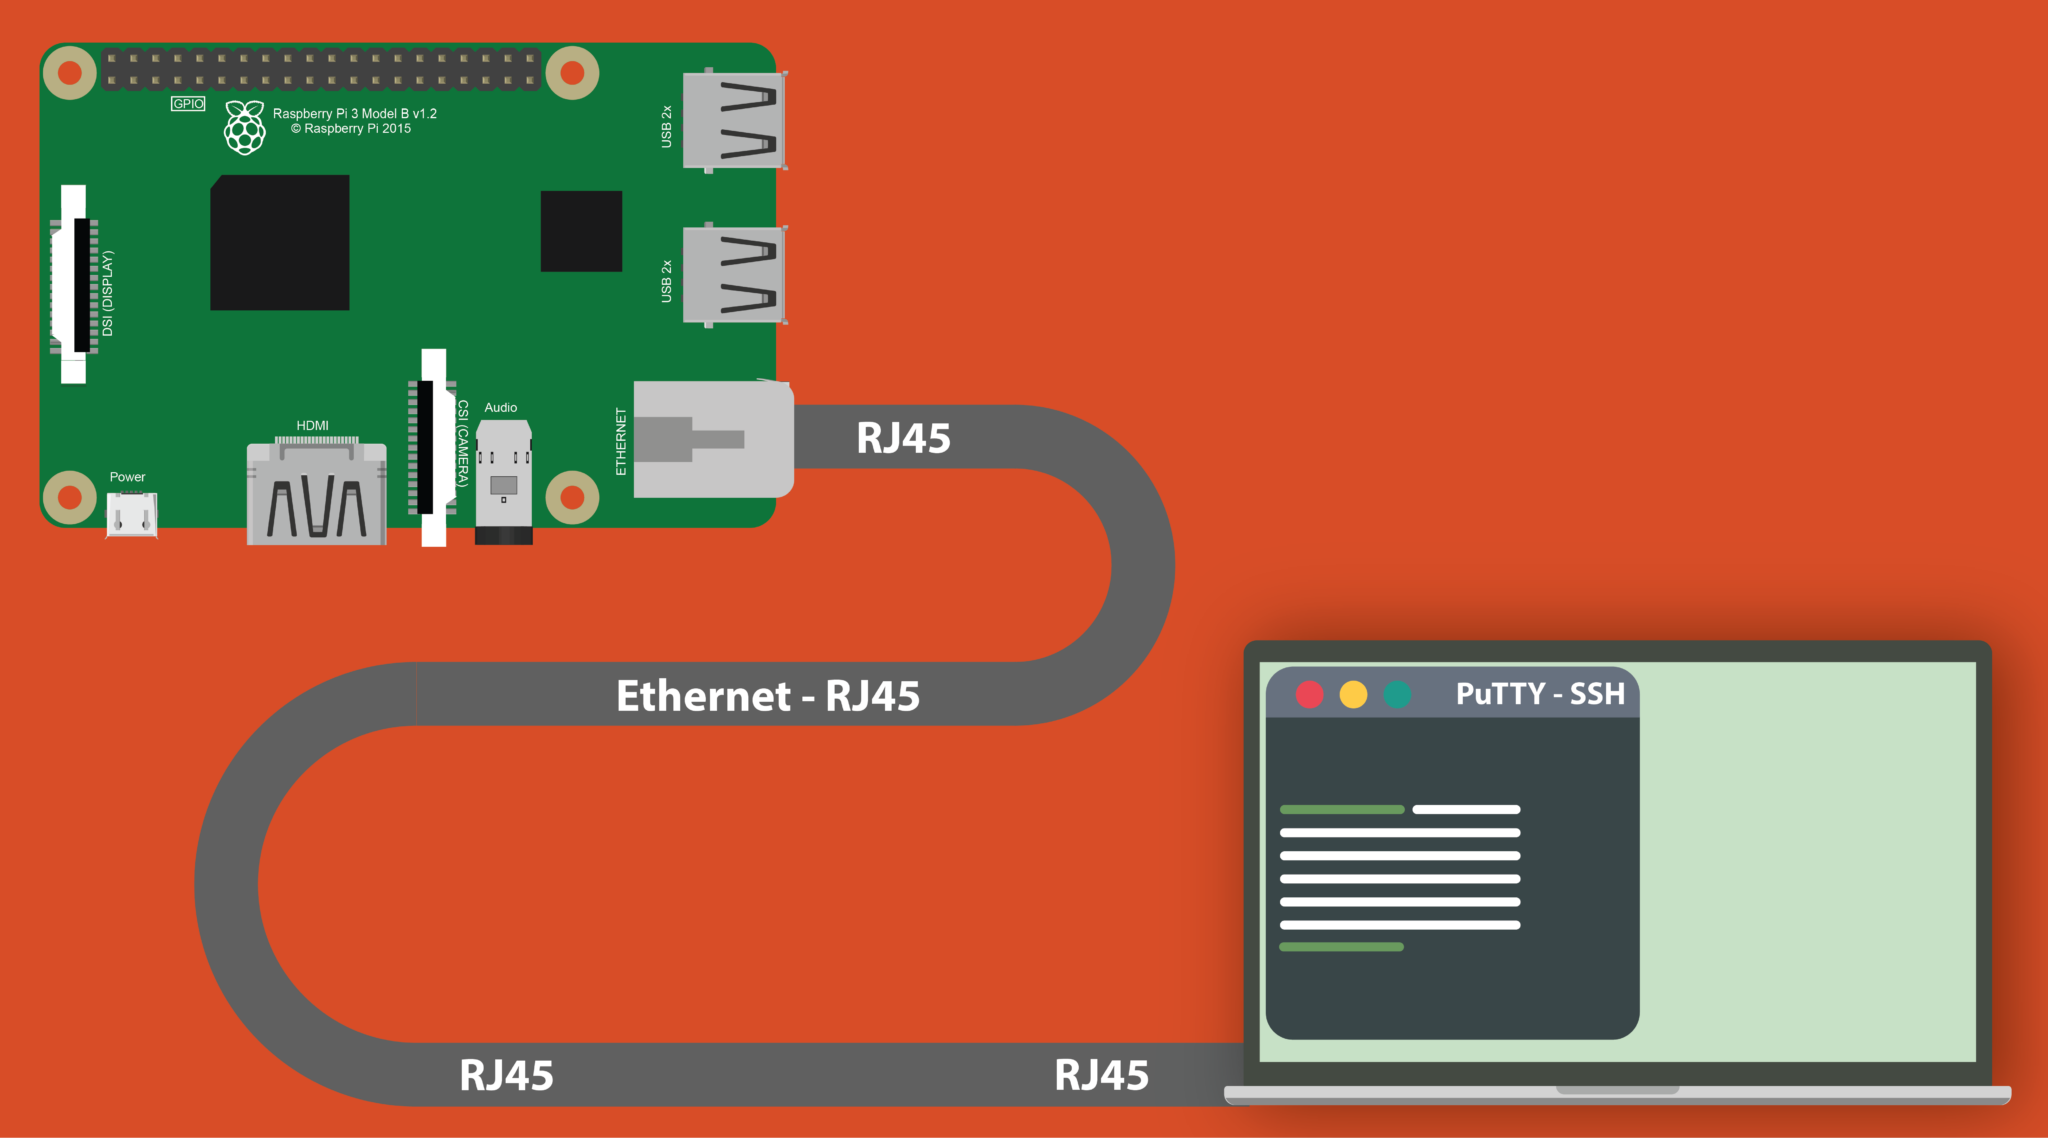
Connecting to Your Raspberry Pi via SSH
Once youve enabled SSH, the next step is to connect to your Raspberry Pi from another device. Heres how to do it using different methods:
1. Using PuTTY on Windows
PuTTY is a popular, free SSH client for Windows. Heres how to use it:
- Download and Install PuTTY: If you don't have it already, download PuTTY from a reliable source and install it on your Windows PC.
- Open PuTTY: Launch the PuTTY application.
- Enter Hostname or IP Address: In the "Host Name (or IP address)" field, enter the IP address of your Raspberry Pi. You can find your Pi's IP address by logging into your router's admin panel or using an IP scanner tool.
- Enter Port (if changed): If you have changed the default SSH port (port 22), enter the new port number in the "Port" field.
- Connection Type: Ensure that the "Connection type" is set to "SSH."
- Click Open: Click the "Open" button.
- Log In: A terminal window will open. Enter the username (usually "pi") and the password for your Raspberry Pi.
- Access Granted: If the login is successful, you will have a command-line interface to your Raspberry Pi.
2. Using the Terminal on macOS and Linux
macOS and Linux systems have built-in SSH clients. Here's how to use them:
- Open a Terminal: Open the terminal application on your macOS or Linux machine.
- Use the SSH Command: Type the following command, replacing "pi" with your Raspberry Pi username and "raspberrypi.local" with your Pi's IP address or hostname (e.g., `ssh pi@192.168.1.100`). If youre using a different port, include the `-p` flag: `ssh -p [port number] pi@raspberrypi.local`.
- Enter Password: You will be prompted to enter your Raspberry Pi's password.
- Access Granted: Once you enter the correct password, you'll have a command-line interface to your Raspberry Pi.
Security Considerations and Best Practices
Enabling SSH opens up your Raspberry Pi to the outside world, making security paramount. Here are some important considerations and best practices:
- Change the Default Password: The default username ("pi") and password ("raspberry") for Raspberry Pi are widely known. Immediately change the password to a strong, unique password to protect your device. Use the command `passwd` in the terminal to change it.
- Use Strong Passwords: Employ strong passwords that are a combination of uppercase and lowercase letters, numbers, and symbols. Avoid using easily guessable information.
- Update Your Raspberry Pi Regularly: Keep your Raspberry Pi's operating system and software updated to patch any security vulnerabilities. Use the commands `sudo apt update` and `sudo apt upgrade` regularly.
- Firewall Configuration: Configure a firewall on your Raspberry Pi to control incoming and outgoing network traffic. The `ufw` (Uncomplicated Firewall) utility is often recommended for its ease of use.
- Disable Password Authentication (Recommended): For enhanced security, disable password authentication and use SSH key-based authentication. This involves generating a key pair (a private key and a public key) and placing the public key on your Raspberry Pi. This eliminates the need to enter a password and makes brute-force attacks more difficult.
- Change the Default SSH Port (Optional): While it's not a complete solution, changing the default SSH port (22) to a less common port can help reduce the number of automated attacks. However, remember to specify the new port when connecting.
- Monitor Logs: Regularly monitor your SSH logs (located in `/var/log/auth.log` or `/var/log/syslog`) for suspicious activity, such as failed login attempts.
- Consider a VPN: If you need to access your Raspberry Pi from a public network, consider using a Virtual Private Network (VPN) to encrypt your traffic and add an extra layer of security.
- Disable SSH When Not in Use: If you don't need SSH access, consider disabling the SSH service. This reduces the attack surface. You can disable the SSH service with the command `sudo systemctl stop ssh` and enable it again with `sudo systemctl start ssh`.
Troubleshooting SSH Connections
Sometimes, you might encounter issues when trying to connect to your Raspberry Pi via SSH. Here are some common problems and solutions:
- Connection Refused: This usually indicates that the SSH service isn't running on your Raspberry Pi or that the firewall is blocking the connection. Make sure SSH is enabled and that the firewall (if enabled) allows SSH traffic. Check the SSH service status with `sudo systemctl status ssh`.
- Incorrect IP Address: Double-check that you're using the correct IP address for your Raspberry Pi. Use an IP scanner or check your router's admin panel to find the IP address.
- Incorrect Username/Password: Ensure you're using the correct username and password. If you've forgotten your password, you may need to re-flash the SD card.
- Firewall Issues: If you have a firewall enabled on your connecting machine or your router, ensure that it allows outgoing SSH connections (port 22 or the port you configured).
- Network Connectivity: Verify that both your connecting device and your Raspberry Pi are on the same network.
- Port Forwarding (For External Access): If you're trying to connect to your Raspberry Pi from outside your local network, you need to configure port forwarding on your router. Make sure you're forwarding external port 22 (or your custom port) to the internal IP address and port 22 of your Raspberry Pi.
- SSH Service Crashed: The sshd service might have crashed. Try restarting the service using `sudo systemctl restart ssh`.
Advanced Configuration
As a security measure, you might want to change the default SSH port (port 22) to a different port. This won't completely eliminate the risk of attacks, but it can reduce the likelihood of automated attacks.
- Edit the SSH Configuration File: Open the SSH configuration file using a text editor with administrator privileges: `sudo nano /etc/ssh/sshd_config`.
- Find the Port Line: Locate the line that begins with `Port 22`. If this line is commented out (preceded by a #), remove the # to uncomment it. Change `22` to the new port number you want to use (e.g., `Port 2222`).
- Save the File: Save the changes and close the editor (in `nano`, press Ctrl+X, then Y, then Enter).
- Restart the SSH Service: Restart the SSH service for the changes to take effect: `sudo systemctl restart ssh`.
- Connect Using the New Port: When connecting to your Raspberry Pi, specify the new port using the `-p` flag (e.g., `ssh pi@raspberrypi.local -p 2222`). If using PuTTY, enter the new port in the "Port" field.
Remember to choose a port number that isn't in use by another service and to make sure your firewall allows connections to the new port. Also, remember to specify the new port number in your SSH client commands when connecting.
Changing the default SSH port on your Raspberry Pi Detailed steps
Changing the default SSH port on your Raspberry Pi is a straightforward process, but it requires careful execution to ensure that you can still connect to your device after the change. Heres a step-by-step guide:
- Access the Raspberry Pi: You'll need to have either physical access to your Raspberry Pi (connected to a monitor and keyboard) or SSH access to it using the default port (port 22) before you make any changes.
- Open the SSH Configuration File: You will need to open the SSH configuration file. Use a terminal and type the following command:
This command opens the configuration file in the Nano text editor with administrator privileges.sudo nano /etc/ssh/sshd_config - Locate the Port Directive: Inside the `sshd_config` file, find the line that starts with `Port 22`. This line defines the port that the SSH server listens on. If this line is commented out (starts with a #), uncomment it by removing the # character.
- Change the Port Number: Modify the port number to the new port you desire. For example, if you want to change the port to 2222, change the line to:
You can choose any port number between 1024 and 65535, but avoid using well-known port numbers that are used by other services.Port 2222 - Save the Configuration File: After changing the port number, save the file. If you're using Nano, press `Ctrl + X`, then `Y` (to confirm save), and finally `Enter`.
- Restart the SSH Service: For the changes to take effect, you need to restart the SSH service. Use the following command:
sudo systemctl restart ssh - Test the New Connection: Try to connect to your Raspberry Pi using the new port. In the terminal, use the following command, replacing `` with your Raspberry Pi's IP address and `` with the port you chose:
If you are using PuTTY on Windows, enter the IP address in the "Host Name (or IP address)" field, the new port number in the "Port" field, select SSH as the connection type, and click "Open".ssh pi@ -p - Update Firewall Rules: If you have a firewall enabled on your Raspberry Pi (e.g., using UFW or iptables), you must update the firewall rules to allow incoming connections on the new port. For example, using UFW, you might run:
sudo ufw allow - Update Router Port Forwarding (If Applicable): If you are accessing your Raspberry Pi from outside your local network, you'll need to update your router's port forwarding settings. Forward the external port (the port you use to connect from outside your network) to the internal IP address of your Raspberry Pi and the new SSH port. If you set up a port forwarding rule to forward external port 22 to internal port 22, it now must be updated to forward external port 2222 to internal port 2222 on the Raspberry Pi's IP address.
Important Notes:
- Testing and Backup: After changing the port, test the connection immediately. If the connection fails, you might need to revert to the previous configuration (edit `sshd_config` to set port 22 and restart the service) via a local connection (monitor and keyboard). Consider backing up your configuration file before making changes.
- Security Considerations: While changing the port provides some security, it's not a substitute for other security measures like using strong passwords, key-based authentication, and keeping your system updated.
- Port Scanning: Even with a non-standard port, malicious actors might still attempt to scan for open ports. It's crucial to implement other security measures, such as disabling password authentication in favor of SSH keys and using a firewall.
Beyond Basic SSH
Once you have a solid understanding of SSH basics, there are several advanced topics you can explore to enhance your remote access capabilities:
- SSH Key-Based Authentication: As mentioned earlier, using SSH keys is highly recommended for improved security. It eliminates the need for passwords and protects your Pi from brute-force attacks.
- SSH Tunneling/Port Forwarding: SSH tunneling allows you to create secure tunnels for other network traffic. This is useful for accessing services on your Pi that aren't directly exposed to the internet (e.g., a web server running on the Pi).
- VNC Remote Desktop: If you need a graphical interface, you can set up VNC (Virtual Network Computing) on your Raspberry Pi. VNC allows you to remotely view and control the Raspberry Pi's desktop.
- SFTP (Secure File Transfer Protocol): SFTP is a secure protocol for transferring files over SSH. You can use SFTP clients to easily upload and download files to and from your Raspberry Pi.
- Automating Tasks with SSH: Learn how to automate tasks using SSH. You can create scripts that connect to your Raspberry Pi and execute commands, making it easier to manage and monitor your device.
Alternatives to SSH
While SSH is the standard for remote access, there are other options available, especially if you are looking for an easier setup or if you need graphical access.
- Raspberry Pi Connect: This is a free service provided by Raspberry Pi that allows you to remotely access your Pi's desktop. It simplifies the setup process compared to SSH and VNC.
- VNC: VNC provides graphical remote access, allowing you to see and interact with your Pi's desktop. It can be set up over SSH for added security.
- Cloud Services: Several cloud services offer remote access solutions for Raspberry Pis, such as RealVNC, which provides a cloud-based VNC viewer. These services often simplify the configuration process and can be easier to set up for remote access outside your local network.
Advanced Configuration and Use Cases
The versatility of SSH extends far beyond simple remote access. Here are some advanced configurations and use cases that highlight the power and flexibility of SSH on a Raspberry Pi.
Setting up SSH Keys (Key-Based Authentication)
As mentioned before, key-based authentication is a critical security enhancement. This process replaces password logins with cryptographic keys, significantly reducing the risk of unauthorized access.
- Generate an SSH Key Pair: On your local computer (the one you'll use to connect), open a terminal and generate an SSH key pair using the command `ssh-keygen`. You'll be prompted to choose a file to save the key and set a passphrase. For simplicity, you can accept the defaults (press Enter for file location and leave passphrase blank for passwordless login).
- Copy the Public Key to the Raspberry Pi: Use the command `ssh-copy-id pi@your_pi_ip` (replace `your_pi_ip` with your Pi's IP address). You'll be prompted to enter your Pi's password. This command copies your public key to the `~/.ssh/authorized_keys` file on your Pi.
- Test the Connection: Try connecting to your Raspberry Pi using SSH. You should now be able to connect without entering a password (assuming you didn't set a passphrase when generating the key). If you set a passphrase, you will be prompted for it.
- Disable Password Authentication (Recommended): For the highest security, disable password authentication in the `sshd_config` file. Edit the file using `sudo nano /etc/ssh/sshd_config`. Locate the line `PasswordAuthentication yes` and change it to `PasswordAuthentication no`. Also, find the `ChallengeResponseAuthentication yes` and change to `ChallengeResponseAuthentication no`. Save the file and restart the SSH service with `sudo systemctl restart ssh`.
Using SSH Tunneling (Port Forwarding)
SSH tunneling allows you to forward traffic from a port on your local machine to a port on the Raspberry Pi, creating a secure, encrypted connection.
- Local Port Forwarding: Use the command `ssh -L local_port:target_host:target_port pi@your_pi_ip`. For example, if you want to access a web server running on your Pi (port 80) from your local machine (port 8080), you'd use `ssh -L 8080:localhost:80 pi@your_pi_ip`. Then, in your browser, go to `http://localhost:8080`.
- Remote Port Forwarding: This forwards traffic from your Raspberry Pi to a port on your local machine. It is less common but useful in specific situations.
- Dynamic Port Forwarding (SOCKS Proxy): This allows you to create a SOCKS proxy, useful for routing all your internet traffic through your Raspberry Pi. Use the command `ssh -D port pi@your_pi_ip`, then configure your browser or operating system to use the SOCKS proxy on the specified port.
Managing Multiple Raspberry Pis
If you manage multiple Raspberry Pis, SSH becomes even more valuable. You can:
- Use SSH Config File: Create an SSH config file (`~/.ssh/config`) to define shortcuts for connecting to each Pi. This file can store hostnames, IP addresses, usernames, and SSH keys, making it easier to manage multiple devices.
- Scripting and Automation: Write scripts to automate tasks across multiple Pis, such as software updates, configuration changes, and data backups.
- Configuration Management Tools (Ansible, etc.): Use configuration management tools like Ansible to manage and configure multiple Raspberry Pis from a single point.
Advanced Security Measures
While we have discussed key-based authentication and changing the default port, here are other steps to consider.
- Implement Fail2ban: Fail2ban is a intrusion prevention framework that protects servers from brute-force attacks. Install and configure Fail2ban on your Raspberry Pi to automatically ban IP addresses that repeatedly fail to authenticate.
- Regular Security Audits: Periodically review your Raspberry Pi's security settings and logs. Identify and address any potential vulnerabilities.
- Network Segmentation: If possible, isolate your Raspberry Pi on a separate network segment to limit the impact of any security breaches.
- Intrusion Detection Systems (IDS): For advanced users, consider implementing an IDS to monitor network traffic for suspicious activity.
Troubleshooting Common SSH Connection Issues
Encountering issues while connecting to your Raspberry Pi via SSH is common. Here's a systematic approach to diagnose and resolve these problems:
- Verify Network Connectivity: First, ensure that both your connecting device and your Raspberry Pi are on the same network and can communicate with each other. Ping the Raspberry Pi's IP address from your connecting device to check for a basic network connection.
- Check SSH Service Status: Use the following command on your Raspberry Pi (either locally or via a temporary connection) to verify that the SSH service is running:
sudo systemctl status sshIf the service is not running, use `sudo systemctl start ssh` to start it, and `sudo systemctl enable ssh` to enable it on boot.
- Check Firewall Rules: If you have a firewall enabled (such as UFW), make sure it allows incoming connections on the SSH port (default: 22, or your custom port). You can check UFW status with `sudo ufw status` and add a rule with `sudo ufw allow ssh` (or `sudo ufw allow `). If you have another firewall, adjust the rules accordingly.
- IP Address and Hostname Resolution: Ensure that you're using the correct IP address or hostname for your Raspberry Pi. You can find the IP address by logging into your router's administration page or by using an IP scanner tool. If using a hostname (e.g., `raspberrypi.local`), make sure your connecting device can resolve the hostname to the IP address (this usually works on a local network, but might require additional configuration for remote access).
- Username and Password: Confirm that you're entering the correct username (usually `pi`) and password for your Raspberry Pi. Try to log in locally with a monitor and keyboard connected to verify that you know the correct credentials.
- SSH Key Issues: If you're using SSH keys and encountering issues, check the following:
- Key Placement: Make sure your public key is correctly placed in the `.ssh/authorized_keys` file in the `pi` user's home directory on the Raspberry Pi.
- Permissions: Ensure that the `.ssh` directory and the `authorized_keys` file have the correct permissions (typically, `700` for `.ssh` and `600` for `authorized_keys`).
- Key Generation: Re-generate your SSH key pair and try again.
- Network Hardware Issues: In some cases, issues can stem from your network hardware. Try the following:
- Reboot Your Router: Sometimes a simple reboot of your router can resolve connectivity issues.
- Check Port Forwarding (If Applicable): If you are trying to access your Raspberry Pi from outside your local network, double-check that port forwarding is correctly configured on your router. Make sure the external port is correctly mapped to the internal IP address and the SSH port of your Raspberry Pi.
- Test with a Different Network: Try connecting from a different network (e.g., a mobile hotspot) to rule out network-specific problems.
- Logging and Error Messages: Consult the SSH logs on your Raspberry Pi for detailed error messages. The logs are typically found in `/var/log/auth.log` or `/var/log/syslog`. These logs often provide valuable clues about the cause of the connection failure.
- Software Conflicts: In rare cases, software conflicts may prevent SSH from functioning correctly. Try uninstalling recently installed software or, as a last resort, reinstalling the SSH server.
By systematically working through these steps, you should be able to diagnose and resolve most SSH connection issues.
Article Recommendations

Detail Author:
- Name : Prof. Arianna Kuvalis MD
- Username : mayert.humberto
- Email : emard.carolyn@ledner.info
- Birthdate : 1970-02-17
- Address : 746 Gusikowski Turnpike Kundeport, SD 04326-1406
- Phone : 1-678-231-2135
- Company : Keebler, Satterfield and Haley
- Job : Professor
- Bio : Laudantium facere et dolor velit ea quibusdam vel id. Modi quibusdam optio vero voluptas. Est quasi iusto eligendi et veritatis eos iure. Ut quis ut labore deserunt vero.
Socials
linkedin:
- url : https://linkedin.com/in/nathaniel_ondricka
- username : nathaniel_ondricka
- bio : Autem commodi quis id voluptates pariatur.
- followers : 3631
- following : 2317
tiktok:
- url : https://tiktok.com/@ondricka1992
- username : ondricka1992
- bio : Officia reiciendis et harum inventore magnam omnis dolorem.
- followers : 2993
- following : 2334
facebook:
- url : https://facebook.com/ondrickan
- username : ondrickan
- bio : Omnis odio porro placeat. Expedita eligendi quae voluptas aut minus.
- followers : 6176
- following : 876
